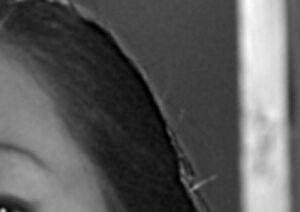
 I've been dealing with some greenscreen footage at work from a client that doesn't often use visual effects. They had the in-camera sharpening filter turned all the way up, which creates a harsh black line around the subject, as seen to the left.
This artifact naturally causes problems when keying, so it needs to be smoothed out in order to get the best results. While it is generally impossible to perfectly remove such filtering once it's been done, it is sometimes possible to reduce it to the point where it no longer breaks the key.
For this technique, we'll investigate a common method of sharpening called the Unsharp Mask. Unsharp mask increases local contrast in an image by subtracting a blurred version of the image from the original, then adding the result back onto the original. The size of the blur determines the size of the details that will be enhanced. Let's take a look at that process first.
Creative Commons Attribution 3.0 license.
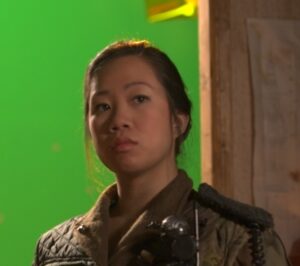
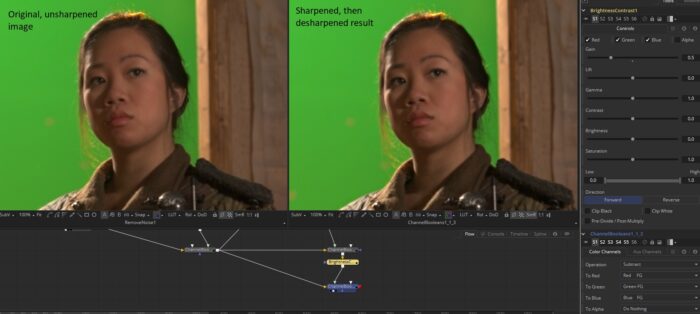
We start with this image, courtesy of the Blender Foundation. It's a little softer than the original already because I used Fusion's lackluster RemoveNoise node to degrain it.
This image gets blurred, and then the blurred version is subtracted. It is important that this happen in floating point because it will produce negative pixel values, which are what create that dark halo.
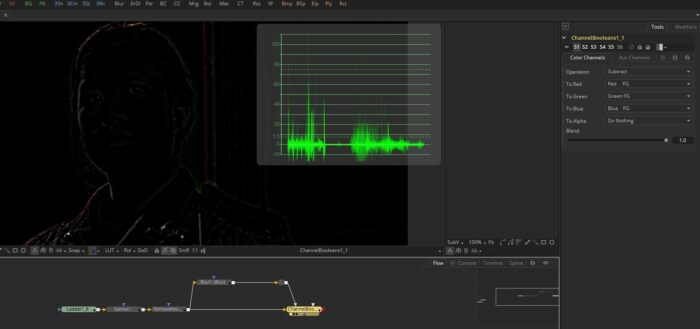
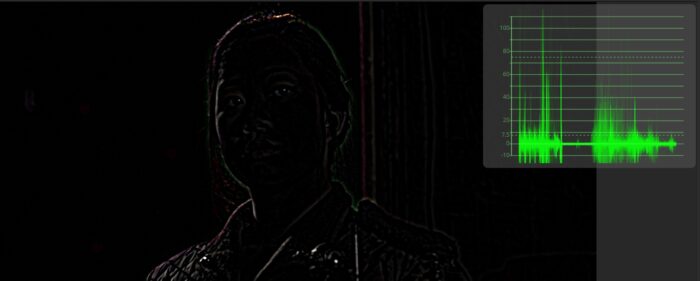
The resulting image is where the technique gets its name. The "unsharp" areas of the image have been masked out, leaving only pixels where the image's details were smaller than the blur radius. The mask image looks somewhat like an edge detect, but take note of the waveform, which shows that the mask pivots around a luminance value of 0:
When the mask is added to the original image, the negative pixels darken it, and the positive pixels brighten it. Since this happens only in places where edges and details were found, the result is an apparent increase in sharpness. In fact, all that's happened is that the details have had their local contrast increased. It may look less blurry to a casual inspection, but no details have actually been enhanced or restored.
Normally, of course, you wouldn't use three nodes to do this—Fusion has a perfectly good Unsharp Mask node that does it all at once, and even most NLEs have a sharpen filter. There is, then, no reason at all to have sharpening turned on in the camera. It's trivial to do as a post process and all but impossible to remove if it's burned in to the image. Nevertheless, removing it is what we are about to attempt.
An addition operation can be easily reversed. In theory , if we can manage to get the exact mask image that was used to create the sharpened result, we could subtract it and wind up back where we started. Obviously, with this hand-built sharpen, that's easy to do. It's not so simple when we don't have access to the original image to begin with.
If we start with the sharpened image and repeat the process that gave us the mask—blur the image and subtract—we'll wind up with another unsharp mask that looks very similar to what we had before, but take a good look at the waveform:
The values are twice as intense as in the previous mask because it's based on an image where the contrast was already increased. If we subtract this mask from the sharpened image, we'll overshoot the result we want. In fact, we'll wind up with just the blurred image.
We will first reduce the Gain of the mask image to 0.5 in order to bring the values down close to what they would have been if we weren't operating on the sharpened image. A Gain operation is a multiplication of the Gain value by the pixel value, so although we're reducing the Gain, the negative pixels will become brighter.
The same result could be achieved by reducing the Blend control on the Subtract to 0.5, but the Brightness Contrast makes it more apparent what is happening.
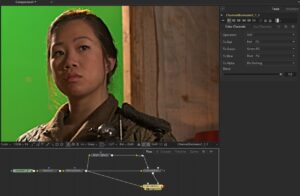
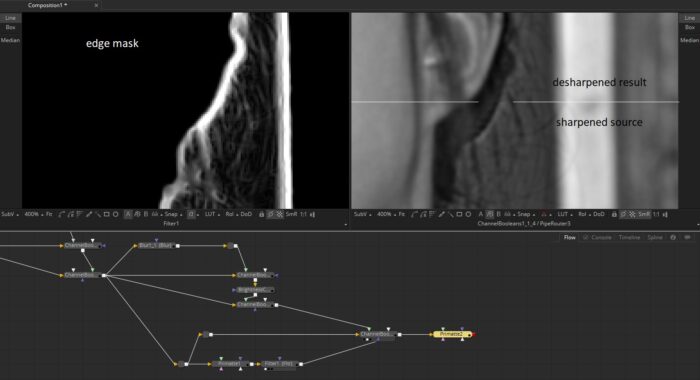
There is a small amount of definition lost in this desharpening process, so it's a good idea to try to limit it to only where you need it. In this case, I'd want to only use it in the edge between the greenscreen and the subject. That's easily accomplished by first pulling a rough key, then using the edge detection method of your choice to find that edge. A ChannelBoolean set to Copy and masked with the edge detect allows us to substitute the desharpened pixels only in the areas they are most needed.
Naturally, I don't want to have to think through this every time I want to use the technique, so I made a macro out of it:
This article is so useful when dealing with stock footage (shot on HD "video" camera).Thanks Ray!
Glad it's useful!