I don't know if any of my small number of readers runs their own WordPress site, but I ran into an annoyance today related to the theme on one of my mine. When I entered the Editor page, an ad for something called "Happyforms" had been placed in the layout. Screen space is precious, and I sure as heck didn't want to give any up to an ad, so I immediately looked for a way to squash it.
DeSharpen for Fusion
 I've been dealing with some greenscreen footage at work from a client that doesn't often use visual effects. They had the in-camera sharpening filter turned all the way up, which creates a harsh black line around the subject, as seen to the left.
This artifact naturally causes problems when keying, so it needs to be smoothed out in order to get the best results. While it is generally impossible to perfectly remove such filtering once it's been done, it is sometimes possible to reduce it to the point where it no longer breaks the key.
For this technique, we'll investigate a common method of sharpening called the Unsharp Mask.Continue reading →
Redshift Camera Metadata in Fusion
Springboarding from Vito's excellent tutorial Exchange Cameras perfectly using the power of Meta-Data, which uses V-Ray, I developed a similar method for Redshift. Redshift's metadata format differs significantly from V-Ray's. First, it's not in an easily-accessed table format; instead, Redshift writes the transform matrix into a comma-separated list. Second, the rotation order of Redshift's matrix is ZXY instead of XYZ. These two issues prevent us from directly using the method Vito shows. Oh, and there's one further problem: The 3DS Max Redshift plugin doesn't yet write metadata to the image, so this won't work there. I have verified it in both Houdini and Maya, though, and I'm reasonably sure it will also work for Cinema4D. In this article, we'll build a Fuse that reformats the metadata into something easier to apply to a Camera3D node. Take warning, though: There be trig ahead!
Morality and Investing
Over the past few years I have been very blessed by an income that greatly exceeds my expenses. While I am still not out of the woods with regard to debt—my student loan still exceeds $60,000—the economy has been in a state where it is more efficient to invest my excess than to pay down the debt. I currently have four investment vehicles, and I'd like to take some time to explain each one and consider not only the financial pros and cons, but also the ethical impact of my decisions.Continue reading →
Combining Normal Maps
My buddy Vito asked for some help with combining normal maps with bump maps in Fusion. He's been using a method that's pretty common but mathematically flawed: Apply the bump to the base normals using Overlay mode. While this Looks About Right most of the time, he wanted to improve his workflow. To be honest, the problem was a little bit over my head, but being unable to resist the technical challenge, I dove in.Continue reading →
First Impressions of Fusion in Resolve 15
Blackmagic Design released the first public beta of Resolve 15, to which they've added a Fusion tab so that VFX work can be done without ever leaving the editing environment. Obviously, that's going to put Fusion in front of thousands more eyes, and given that I'm writing a book about it, that seems like good news to me! So it behooves me to try it out as early as possible.
Now, given that I'm a reasonably advanced user of Fusion, it's to be expected that I'll hate a lot about trying to use it in the context of Resolve. I really have no interest in being an editor, so my inclination is to resist wrapping my software inside an editing program. Keep that in mind if I get overly negative. I'm sure for editors who want to dabble their toes in effects, it's the Best Thing Evar.Continue reading →
Here's a little tease of what Muse has been working on for Legion
here’s an Idea! NEVER wAit 4 the ball to D
rop,
or the egg 2 CR//AC/K #legiOnFx pic.twitter.com/LH9QGNgxFs— Legion (@LegionFX) March 27, 2018
…I should really learn how to use Twitter properly.
It's a Great Time to be a Fusioneer!
Over the past three months or so, there have been quite a few very encouraging and exciting developments in the Fusion community. Just in case any of them have been overlooked, I thought I'd take a few minutes out of your day to tell you about them.
![]() The first thing I'd like to point out is the release of Reactor, a package manager for Fusion. Reactor makes it dead easy to find, download and install new tools. My own Glitch Tools are available there, as are several other offerings from Muse VFX.Continue reading →
The first thing I'd like to point out is the release of Reactor, a package manager for Fusion. Reactor makes it dead easy to find, download and install new tools. My own Glitch Tools are available there, as are several other offerings from Muse VFX.Continue reading →
Blackmagic Fusion: Reflections
Commenter Steven Newby asked for a deeper look at the Reflect node because the existing tutorials he could find on YouTube apparently only examined reflections on a sphere. In this article, we'll take a detailed look at Reflect3D and how to use it to best effect.
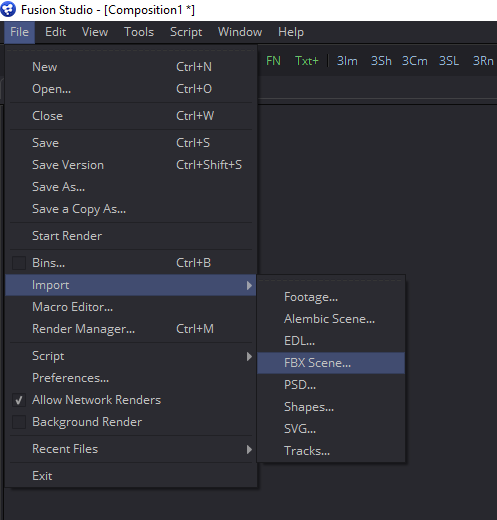 Regrettably, I'll need to use Fusion 8 for this demonstration because I'm on a loaner PC that can't run Fusion 9. I therefore won't be able to provide screenshots for the use of the new spherical camera, but hopefully my description will suffice. To get started grab this coffee cup geometry, which may be familiar from the 3d workspace chapter of the upcoming book. Import the cup and saucer into the scene using the File > Import > FBX Scene… command.
The default settings are fine, so just click OK to get five new nodes in your Flow: Two Blinn materials, two FBX nodes, and Merge3D that weds the geometry together. The scale of the geometry is a little big, so in the Merge3D, switch to the Transform tab and reduce the scale to 0.1. If you like, you can also move the Y Offset control to put the bottom of the saucer at 0. Both of those things are optional, but I find it more comfortable to work that way.
![]() I'm not concerned with integrating the cup with a photograph this time; instead, let's see if we can't make a really nice product photo image like you might see in a catalog. We'll go for a super shiny and clean look.
I'm not concerned with integrating the cup with a photograph this time; instead, let's see if we can't make a really nice product photo image like you might see in a catalog. We'll go for a super shiny and clean look.
Blackmagic Fusion: Cameras, Lenses and Sensors
Fusion 9 has been released, and the retail price for the Studio version has dropped to a mere $299. From this article forward, I'll be using Fusion 9 Free on Windows 10. Although the new price point makes Fusion Studio more accessible than ever, I will continue with the assumption that the student is using the Free version. Studio-only features may be detailed in supplemental chapters on the website.
In the previous chapter, we used Fusion's 3D system to match the position and angle of view of the physical camera used to take a photograph. We also did a little bit of grain and focus matching to help integrate the coffee cup into the plate. In this chapter, I'd like to expand on those ideas by discussing the various qualities and defects that film and video cameras produce and how to mimic them for the most convincing composite possible.
I have arranged these concepts roughly in the same order that they affect the image. When setting up a composite, it is helpful to arrange your nodes in a similar order in order to maintain realism. For instance, you wouldn't want to perform a lens distortion before the camera shake because the lens is attached to the camera and will therefore shake with it. Likewise, grain should be applied after all optical effects because it is a property of the sensor or film and therefore affects almost everything, including such things as lens flares and blur.Continue reading →