This is the third article in a series on OpenCL Fuse development for Blackmagic Fusion. I am attempting to convert the lessons from the Book of Shaders into working Fuses, learning a bit about programming and parallel processing as I go. I have no doubt that I violate dozens of best practices, as I am entirely self-taught in this area.
This time around, we'll look at how to introduce temporal and spatial variation into the generated image by creating a mode where the image slowly pulses and one where the color is tied to the pixel's screen position, making a gradient.
I have just finished up two days of doing demos and answering questions at Blackmagic's booth on the expo floor at SIGGRAPH. I had a fine time meeting the people behind Fusion and learning a little bit more about the company. Not to mention all the interested compositors, editors, and graphics artists interested in the new software. There was a healthy mix of enthusiasm, skepticism and curiosity.Continue reading →
In the previous article in this series, I introduced the notion of making a series of Fuses based on the lessons from Vivo & Lowe's Book of Shaders. I provided the template I usually start from and a brief rundown of how the parts work. Today, we'll look at the simplest of kernels. As pointed out at BoS, the customary first program people write when learning a new language is one that prints the message "Hello World!" to the standard output. Graphics programming is, by its nature, not well suited to printing messages of this kind, so this "Hello World" program instead fills the output image with a solid color. The OpenCL program is a little longer than the GLSL one given at BoS, but not much. Most of the added complexity comes from the interface between the Fuse and OCL.
That Voronoi Fuse I documented recently is really slow, and there are quite a few features that I would like to add to it. Unfortunately, each new feature will only make it slower, so I have decided to try once again to tackle OpenCL. This time, though, I'm going to do it a little more formally by converting the algorithms detailed in Patricio Gonzalez Vivo and Jen Lowe's The Book of Shaders (BoS).
The information in We Suck Less' recovered VFXPedia wiki is good, but there are some holes in it, and it assumes a certain level of expertise that I, frankly, do not have. Therefore, this series of diaries is intended to be a little more rigorous for the benefit of dabblers like myself. Enough with the introduction; let's get working!
Sometimes the effect demanded for a shot is more complex that what can be created in the compositor. Computer animated characters, sophisticated fluid and particle simulations, spacecraft, and detailed environments are more commonly created in separate, dedicated 3d software such as Maya, Houdini, or Modo, among others. These programs offer not just better modeling and animation tools, but much more powerful rendering engines. A render engine transforms information about 3D objects into images of those objects. Most 3d programs have their own built-in renderers, but most can also use add-on renderers like V-Ray and Redshift.
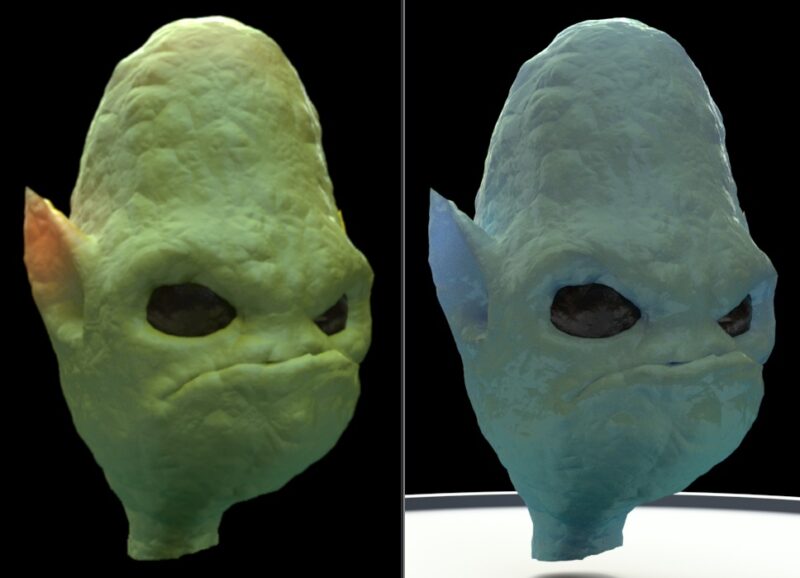
In addition to the finished image, the renderer can split the output into a variety of different buffers, or passes. Unlike photography, which can only record the combined light all at once, a renderer can record the surface color (diffuse), reflections, bounce light, shadows, and other properties of the light in separate images, which can then be combined in the compositor to construct the final image. While this may seem like a lot of extra work, it gives you a great deal of flexibility to exactly control the look of a Computer Generated Image (CGI). In this chapter, we'll look at render buffers created by Houdini's Mantra render engine and learn how to use them to control the look of a CGI character.Continue reading →
In the previous chapter, we created some fairly sophisticated behavior using expressions. Setting up such systems takes some time, though, and if you build something that you like, you may wish to use it again later on, either for its own sake or as a component for something even more complex. Fusion allows you to create macros, which are collections of tools that can have customized controls and be reused. The Nuke equivalent is a gizmo. After Effects doesn't have a direct analogue, although both presets and templates fill something of the same purpose.
Fair warning: This chapter is going to get a little technical, and we'll even be writing a little code. I promise it won't hurt much, and when we're done, you'll be that much more valuable as a compositor!Continue reading →
In my efforts to expand my capabilities in Fusion, and in visual effects generally, I have taken my first steps into the creation of Fuses. A Fuse is a custom tool for Fusion written in Lua. It's sort of a half-way point between Macro and Plug-in. It's more flexible than a Macro because it doesn't rely on existing tools—so the Spline View won't be cluttered by a hundred LUT controllers from Custom Tools. Unlike a Plug-in, it doesn't require compiling, and it will run in the free version of Fusion 8.
This particular Fuse creates a Voronoi segmentation:
Thus far we have talked a great deal about how to integrate footage together, how to manipulate it, and how to cut it apart and sew it back together in a new configuration. What about creating effects that the production didn't shoot?
There are generally two ways of approaching an effect that needs to be added to a shot. Usually the easiest and simplest method is to find some kind of prepared element. I doubt you will find a VFX shop that doesn't have several collections of such elements in its library. For my occasional freelance work, I have a subscription to Digital Juice and a collection from Video Copilot called Action Essentials 2. These provide me with enough stock footage and elements to cover most of my needs. If you have access to a decent camera and a place with controlled lighting, you can also frequently shoot your own elements. This can be as simple as making blistering vampire flesh with hot sauce and baking soda, or as complex as setting up a cloud tank.
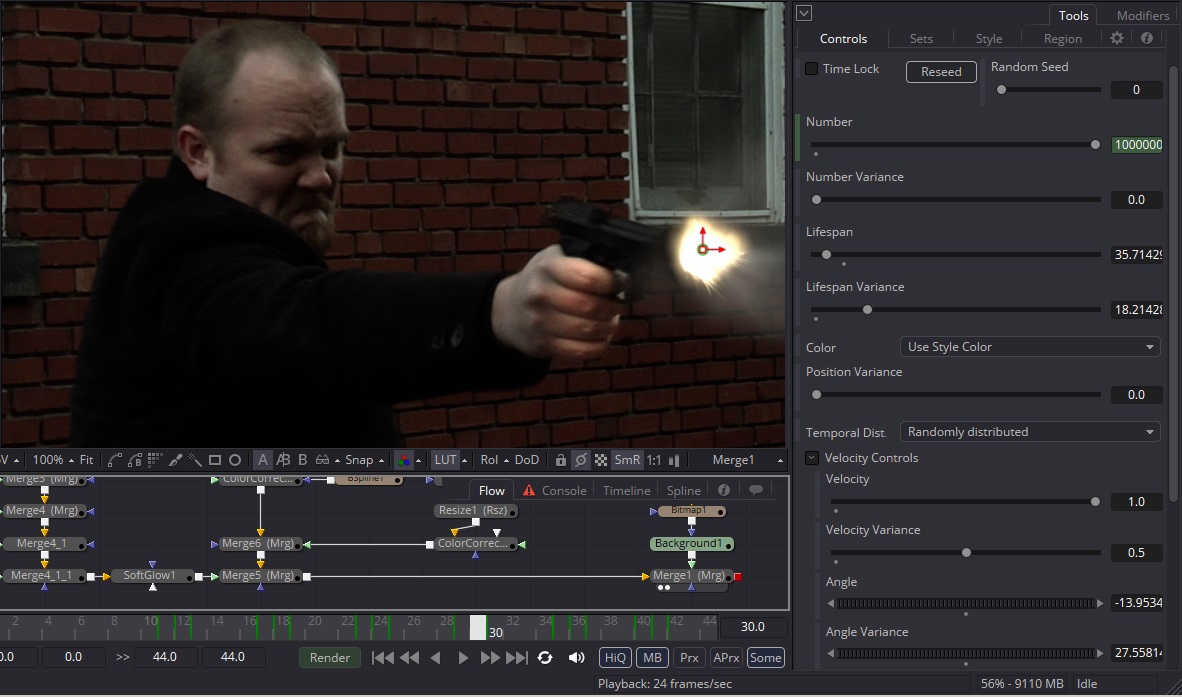
The other way is to create custom effects either in 3d software or in the compositor itself. Fusion has a powerful particle system that works in both 2d and 3d as well as many image and pattern generation tools to generate unique effects that can be driven by your footage. In this lesson, we'll use an element to give James' gun a muzzle flash and a particle system to create smoke streaming from the barrel. We'll also add some interactive light on his face and hand to better sell the flash.Continue reading →
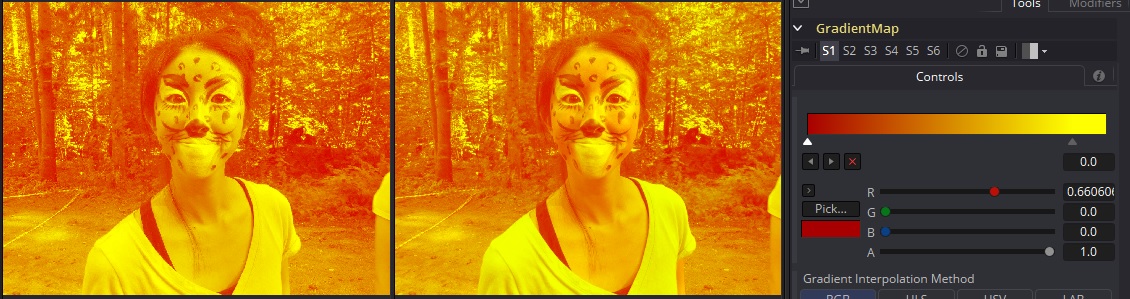
A quick little macro. A couple of days ago, I needed a gradient map, a la Photoshop. My brain was on the fritz all week, so I asked my excellent coworker Joe Laude for help. He did something with a Displace node that bent reality a little for me. I honestly still don't quite understand what's going on in his set up, although it definitely solved my immediate problem. After a couple of days of recharging, I figured out a more straightforward (though possibly slower) method using my favorite node: the Custom Tool.
A gradient map assigns a color from a linear gradient based on the brightness of the input pixel.
The Problem: Assign a color from a linear gradient to an image based on the brightness of the pixels in an input map. I want to be able to manipulate the gradient with the same level of control that I get from a Background tool, mask it, and have a standard Blend slider.
The Solution: For each pixel, I need to evaluate its brightness and use that to pick a color from the linear gradient. As it happens, I solved this problem when I built my own Texture tool almost two years ago. The get function described there (look for the "Big Green Marker") does exactly what I want. All I have to do here is substitute a user-defined Gradient Map for the UV Map and a linear gradient image for the Raw Diffuse image.
Just to keep everything on the same page, as it were, in the Color Channels Expression fields, I place the following code (consult the Fusion Tool Reference, page 459, for more details on this function):
getr2d(c1,c1)
getg2d(c1,c1)
getb2d(c1,c1)
a1
That fetches the RGB information at x- and y-coordinates equal to the appropriate channel in the Map Input. Generally speaking, you should feed a grayscale image into the tool, but it can be biased by giving it a full color map, which serves to preserve a little bit of the tint of the original image.
Grayscale input on the left, full color on the right.
It's subtle, but you can see a little bit of the green from the bushes on the right behind Christina's shoulder, and some of the pink in her make-up. (Apologies to Christina for bogarting this pic—it makes me smile every time I look at it, so I often use it for testing workflows.)
After a day's thinking about it, this is much easier to accomplish by simply using the Texture tool. Just copy your brightness map into the UV channels. Put that into the Input and the gradient into the Texture input.
And then the kind people over at We Suck Less pointed out that the same thing can be done with the Fast Noise tool by plugging your brightness map into the NoiseBrightnessMap input, though it has to go through a Bitmap node first to convert it to a single-channel image. This method also allows some of the FastNoise's details to be mixed in.
Cookie Consent
I really don't care to learn anything about visitors to this site, but there are Google Analytics installed, so if you care about being tracked, click the appropriate button. And if you ever see ads being served here, run a malware scanner. If that doesn't help, please notify me.
Contains information related to marketing campaigns of the user. These are shared with Google AdWords / Google Ads when the Google Ads and Google Analytics accounts are linked together.
90 days
__utma
ID used to identify users and sessions
2 years after last activity
__utmt
Used to monitor number of Google Analytics server requests
10 minutes
__utmb
Used to distinguish new sessions and visits. This cookie is set when the GA.js javascript library is loaded and there is no existing __utmb cookie. The cookie is updated every time data is sent to the Google Analytics server.
30 minutes after last activity
__utmc
Used only with old Urchin versions of Google Analytics and not with GA.js. Was used to distinguish between new sessions and visits at the end of a session.
End of session (browser)
__utmz
Contains information about the traffic source or campaign that directed user to the website. The cookie is set when the GA.js javascript is loaded and updated when data is sent to the Google Anaytics server
6 months after last activity
__utmv
Contains custom information set by the web developer via the _setCustomVar method in Google Analytics. This cookie is updated every time new data is sent to the Google Analytics server.
2 years after last activity
__utmx
Used to determine whether a user is included in an A / B or Multivariate test.
18 months
_ga
ID used to identify users
2 years
_gali
Used by Google Analytics to determine which links on a page are being clicked
30 seconds
_ga_
ID used to identify users
2 years
_gid
ID used to identify users for 24 hours after last activity
24 hours
_gat
Used to monitor number of Google Analytics server requests when using Google Tag Manager
1 minute
You can find more information in our Cookie Policy and .