While I was studying visual effects in college, one of my instructors ran us through an exercise where we recreated a simple chroma-key tool using basic nodes in Shake. The result was no more functional than just using a Chroma Key node, but by understanding what goes on inside the tool, we gained a better understanding of how to use it and, probably more importantly, when not to use it. Unfortunately, I did not really appreciate the lesson at the time, and I do not recall the structure of that custom tool. Years later, however, I have come to realize that I can greatly expand my capabilities by reverse-engineering some of my compositing software's tools and applying what I learn to make new ones.
Long story short: I spent a little time this week deconstructing the Texture tool in Blackmagic Fusion and building a new one using the CustomTool. It turns out that the node is ridiculously simple, but it takes a bit of mental gymnastics to understand what's going on. Or at least, it did for me. So let's get into it. (If you already know how to use the Texture Node, you can skip to the end. I'll put a big red marker down there so you can find it.)
First, the typical use of the Texture node is to use a UV pass from a CG render to apply a new or modified texture to an already-rendered object. For instance, suppose you have a CG character that is wounded. At the eleventh hour, the client decides they want to see blood running from the wound. A dripping blood texture is not difficult to create, and you could certainly make one, apply it to the character and rerender, but that will involve the 3d artist (possibly two if texturing and lighting are handled by different people) staying late, and the compositor staying even later waiting on the new asset. But imagine if you could simply apply the new texture in comp without having to go through all that. If you have a UV pass and access to the character's texture, or at least a UV layout for the texture, you can use Fusion's Texture node to apply the dripping blood right inside Fusion. The CG guys get to go home on time, and you get to be the hero for a day.
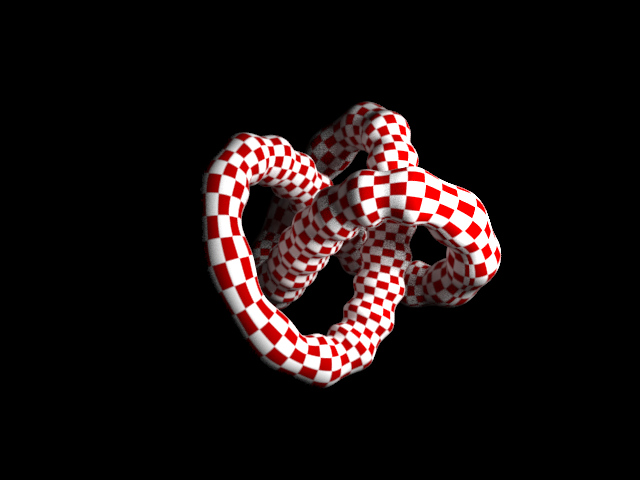
Now, I don't have a creature set up for the purpose of illustration, so my examples are going to be done on a 3DS Max primitive. I have here a torus knot created in 3DS Max with a checker pattern applied to it, rendered in V-Ray:
And the other render passes I will be using:

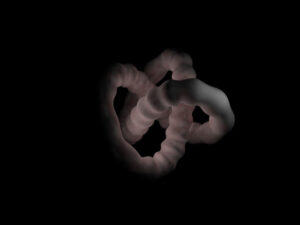
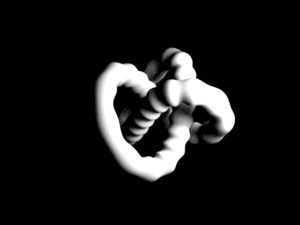
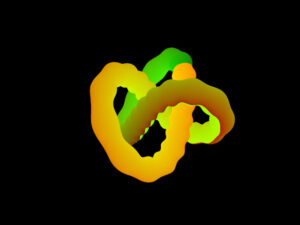
The Texture node has two inputs: The background (gold triangle) must have UV channels set up with a UV pass from render. In this example, each render pass is in a discrete file, and so I have to use a Channel Booleans node to inject the UV pass into the proper channel:
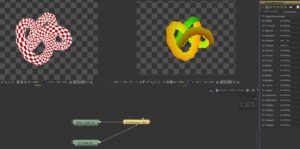
If you have a multi-channel EXR, the UV channel is probably already in the right place in the stream, but it's a good idea to check the loader to be sure. If it wasn't named exactly the way Fusion expected, you will have to assign it manually.
For the workflow I am showing here, it doesn't really matter what's in the RGB channels; I am using the Diffuse pass just to keep track of it. I'll wire it back in at a later point to check my work. Next in the flow is the Texture node. As I said, the output of the Channel Booleans goes into the background. The foreground receives a texture, set up just like you would in a 3d program. In this case, I'm just using a square FastNoise. The torus knot's structure means that its UV coordinates are stretched oddly across its surface; they're not proportionate. Back in Max, I set the tiling for my checkerboard to 70 in U and 6.5 in V in order to get the nice pattern I show here. Unfortunately, Fusion won't let me do the same thing. I can scale both U and V, but they don't simply tile the texture like you'd expect. Instead, they stretch it non-linearly. If I scale so that the pixels near U = .5 look nice, the pixels near U = 0 are greatly compressed. Part of the problem is that my render is sRGB instead of linear. Correcting that allows me to stretch the UVs a little bit to get reasonable coverage. Here's my set-up so far:
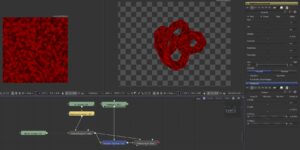
As you can see, the FastNoise texture sticks to the geometry as if it were the original diffuse pass:
The next step is to add the light and shadow back, which brings me to the reason I chose the rawGlobalIllumination and rawLighting passes. The difference between the raw passes and the regular ones is that the regular passes have been multiplied by the diffuse color. Since I knew I was going to be replacing that diffuse color with a new texture, I wanted the raw information. It takes just a bit more work to apply it in a normal workflow, but for this job it will save us from having the original checker pattern creep back into the output.
A typical V-Ray render can be reassembled with the following formula: Global Illumination + Lighting + Specular + Reflection + Refraction + Self Illumination + Sub-Surface Scattering. Notice that Diffuse is apparently absent. In fact, the Diffuse pass is included because most of those passes (Specular, Self Illumination and SSS are excepted) are multiplied by Diffuse. So the complete formula is actually: Raw GI * Diffuse + Raw Lighting * Diffuse + Spec + Raw Reflection * Reflection Filter + Raw Refraction * Refraction Filter + Self Illumination + SSS. A much more complex compositing task, but technically more complete. Normally that doesn't make a difference, but since we're replacing the Diffuse element, we need the longer formula, and the raw render passes to plug into it.
note: I had previously given the wrong formula. Multiply ReflectionRaw and RefractionRaw with their own appropriate filters, not by Diffuse. We want the texture information from objects being refracted and reflected, not the diffuse from our object—there is no contribution to those components from the object's own diffuse texture. That's the point!
Here's the flow:
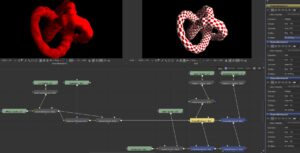
The canvas is set up by the background. Each raw lighting pass is multiplied by the new Diffuse, then added to the image. The original beauty pass is in the right-hand viewer for comparison. The color correct on the GI pass is there to desaturate that pass so the original checkerboard's color does not contaminate the composite. Technically, even after the desaturation, that's still an issue here, but the contribution of the original texture is minute enough to be fairly well invisible. It would certainly be a much bigger problem for passes with more detail such as reflection and refraction, but the Texture node can be used to modify those passes, as well, by compositing in modifications above the diffuse multiplication. The MatteControl is premultiplying to get rid of the spurious colors caused by undefined pixels in the UV pass.
Here's your big red marker.
So that's how the tool is used, but what about how it works? That was, after all, the point of this article. I'm going to get into exactly how UVs work here, so again, if you already know this stuff, scroll a bit further. The CustomTool example's at the very end, after the big green marker.
U and V are a coordinate space for textures. In your 3d application, you already have a Cartesian space that describes the world: X, Y, and Z tell you exactly where you are in space. Even we 2d artists understand that much. U and V are a little bit head-bending at first, though. Imagine for a moment that you've laid out Cartesian coordinates in whatever room you're in. Now take a piece of paper and make a simple line graph on it. Normally, you'd label the axes of your graph X and Y, but since you already have coordinates in your room, X and Y are taken. Instead, label the horizontal axis U and the vertical axis V. Now you can accurately describe the line on that paper no matter where in the room it goes, how you turn it, or even if you roll it into a tube or crumple it up. The paper's center has X, Y, and Z coordinates, and any given dot on the paper has U and V coordinates.
In a UV render pass, the U texture coordinate is described by the red channel, and the V coordinate is on the green channel. If you were to just render a flat plane facing the camera, you'd have a perfect linear gradient from 0 – 1 horizontally in the red and from 0 – 1 vertically in the green. When the UV pass is wrapped around geometry, that gradient will typically run across its surface instead. Depending on how the object is oriented, you may not be able to see every value. 0 or 1 might be hidden from view in either or both channels. In the torus knot we've been dealing with, you can clearly see the seams at the edges of the UV space. Those correspond to the outer edges of the texture map. So what the Texture tool does is to look at the U and V values for a given pixel in the background (gold) input, then it fetches from the foreground (green) input whatever color it finds at those coordinates. So if the U value is .65 and the V value is .78, the output pixel will be whatever color is found at the coordinates (.65, .78) of the texture image.
I'm a big green marker!
Therefore, in the channels tab of a CustomTool, the following expressions should go into the RGB fields:
getr2b(u1,v1)
getg2b(u1,v1)
getb2b(u1,v1)
These expressions sample the color from input 2 at the specified coordinates. As I said, it's ridiculously simple. Of course, I didn't build in the offset or scale controls, which would complicate matters. That could be done using the number sliders and the Intermediate fields. I believe it should also be possible to solve the non-linear scaling problem. If I get around to doing that, I'll update this post with instructions and the completed tool. For now, here's a node you can copy-paste into a flow
{
Tools = ordered() {
CustomTool1 = Custom {
CtrlWZoom = false,
Inputs = {
LUTIn1 = Input {
SourceOp = "CustomTool1LUTIn1",
Source = "Value",
},
LUTIn2 = Input {
SourceOp = "CustomTool1LUTIn2",
Source = "Value",
},
LUTIn3 = Input {
SourceOp = "CustomTool1LUTIn3",
Source = "Value",
},
LUTIn4 = Input {
SourceOp = "CustomTool1LUTIn4",
Source = "Value",
},
RedExpression = Input { Value = "getr2b(u1,v1)", },
GreenExpression = Input { Value = "getg2b(u1,v1)", },
BlueExpression = Input { Value = "getb2b(u1,v1)", },
},
ViewInfo = OperatorInfo { Pos = { 2255, 577.5, }, },
},
CustomTool1LUTIn1 = LUTBezier {
KeyColorSplines = {
[0] = {
[0] = { 0, RH = { 0.333333333333333, 0.333333333333333, }, Flags = { Linear = true, }, },
[1] = { 1, LH = { 0.666666666666667, 0.666666666666667, }, Flags = { Linear = true, }, },
},
},
SplineColor = { Red = 204, Green = 0, Blue = 0, },
NameSet = true,
},
CustomTool1LUTIn2 = LUTBezier {
KeyColorSplines = {
[0] = {
[0] = { 0, RH = { 0.333333333333333, 0.333333333333333, }, Flags = { Linear = true, }, },
[1] = { 1, LH = { 0.666666666666667, 0.666666666666667, }, Flags = { Linear = true, }, },
},
},
SplineColor = { Red = 0, Green = 204, Blue = 0, },
NameSet = true,
},
CustomTool1LUTIn3 = LUTBezier {
KeyColorSplines = {
[0] = {
[0] = { 0, RH = { 0.333333333333333, 0.333333333333333, }, Flags = { Linear = true, }, },
[1] = { 1, LH = { 0.666666666666667, 0.666666666666667, }, Flags = { Linear = true, }, },
},
},
SplineColor = { Red = 0, Green = 0, Blue = 204, },
NameSet = true,
},
CustomTool1LUTIn4 = LUTBezier {
KeyColorSplines = {
[0] = {
[0] = { 0, RH = { 0.333333333333333, 0.333333333333333, }, Flags = { Linear = true, }, },
[1] = { 1, LH = { 0.666666666666667, 0.666666666666667, }, Flags = { Linear = true, }, },
},
},
SplineColor = { Red = 204, Green = 204, Blue = 204, },
NameSet = true,
},
},
}
If you come up with clever ways to use the Texture tool, or if you add significant functionality to this CustomTool node, let me know in the comments. If you're really an overachiever, see if you can invent a node that reverses the process. That node would look at a given pixel's UV values, then create an output image in which that pixel's color is placed at those coordinates. So far I haven't figured out a way to push pixel information into the output, only pull it from the inputs. I suspect that job will require a Fuse since I have yet to see a way to create a random-access array variable accessible by an expression.
I know that this is an old post but maybe you can help. I trying to use this alembic re-texturing workflow for product packaging design. I'm having texture for coca-cola size bottle label. And I can map it and even rotate with texture offset. It's super cool cause with every iteration of label design I don't have to re-render again. I can just swap new texure inside Fusion.
BUT: new diffiuse/alembic looks pixelated comparing to original one (the one from the render). I guess it has to do something with aliasing (or lack of it) when Fusion reprojects new texture using UV. I tried to blur a little bit the image before reprojecting. It helps a little but not that much.
Any idea what else can be done?
Unfortunately, the Texture node doesn't have any options for antialiasing, and blurring before applying it will just compound the problem. The typical workaround is to perform some manual supersampling. Scale all of your inputs by 2 or 4, apply the texture, then scale the result back down to its original size. You can choose a filtering method in the second Scale. Usually Catmull-Rom is a good choice—it does some gentle sharpening and doesn't start ringing unless there's very dramatic contrast in the texture. If C-R is too sharp, then cubic is usually my second choice.
Thanks. That actually worked pretty well. In my case scaling x4 with Gaussian filter method looks very similar to actual render.